Showing posts with label Stamperia. Show all posts

Tuesday, 11 January 2022

Happy Unbirthday

I have created another card with my Stamperia - Alice Through the Looking Glass collection.


I used one of the beautiful patterned papers as the background and fussy cut Alice from one of the Card Collection toppers, I popped her up on the matching topper cut from the paper pad and added that to the card front using foam pads. I added the Eat Me label using foam pads and decorated the inside of the card with more of the patterned papers.


Thank you for popping in today, your company is much appreciated - please leave a comment so that I can come and visit you.

Pauline
x

Wednesday, 5 January 2022

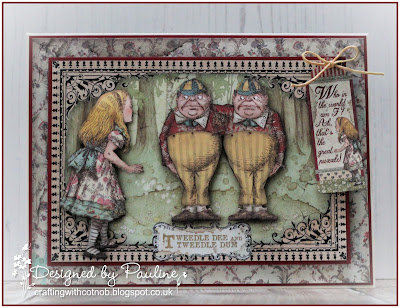
Tweedledee and Tweedledum

I decided to create some cards with the Stamperia Alice Through the Looking Glass collection, I have a bit of a thing about Alice!

I have the 12 x 12, 8 x 8 and 6 x 6 paper pads, I also purchased the Cards Collection, there are several different sizes of toppers, some are repeats of the toppers in the 12 x 12 paper pad and you know what that means - I can do some fussy cutting and layer them up for dimension.


I used one of the beautiful patterned papers as the background and fussy cut Alice and Tweedledee and Tweedledum from one of the Card Collection toppers, I popped them up on the matching topper cut from the paper pad and added that to the card front using foam pads. I trimmed the inside of the frame from the Card Collection topper to use on the inside of the card, I just put some cream cardstock behind it and layered it up on some more of the patterned paper. I fussy cut the little tag from one of the papers and added a small twine bow.


Thank you for visiting my blog today and thank you for all of the lovely comments that you leave, they are all read and much appreciated.

Pauline
x

Friday, 22 October 2021

Hortensia Sliding Box

I think I mentioned that I was taking part in another Facebook Live Workshop with Clare from My Creative Spirit last weekend, this is the box that we created - it has a sliding lid, when I first saw what we were going to make I was a little worried, I thought it would be rather difficult but Clare's instructions were easy to follow and the process is quite straight forward.


Above you can see the box closed and below you can see it with the lid partly open, I used papers from the Stamperia Hortensia collection to decorate my box, the inside has been covered with black card stock, I am currently working on the album that goes inside - Claire shows us how to make the album base in the workshops and gives us several different options for decorating but leaves it up to us to decide on what papers to use and how to finish our albums.


This is the box with the lid completely removed.


The Hortensia papers are gorgeous, it was quite difficult to cut into them - below you can see the decorated sides of the box, I will share the album when I have completed it, it could take quite a long time!


Thank you for popping in today and thank you for all of the lovely comments that you leave, they are all read and much appreciated.

Pauline
x

Wednesday, 20 October 2021

Sleeping Beauty

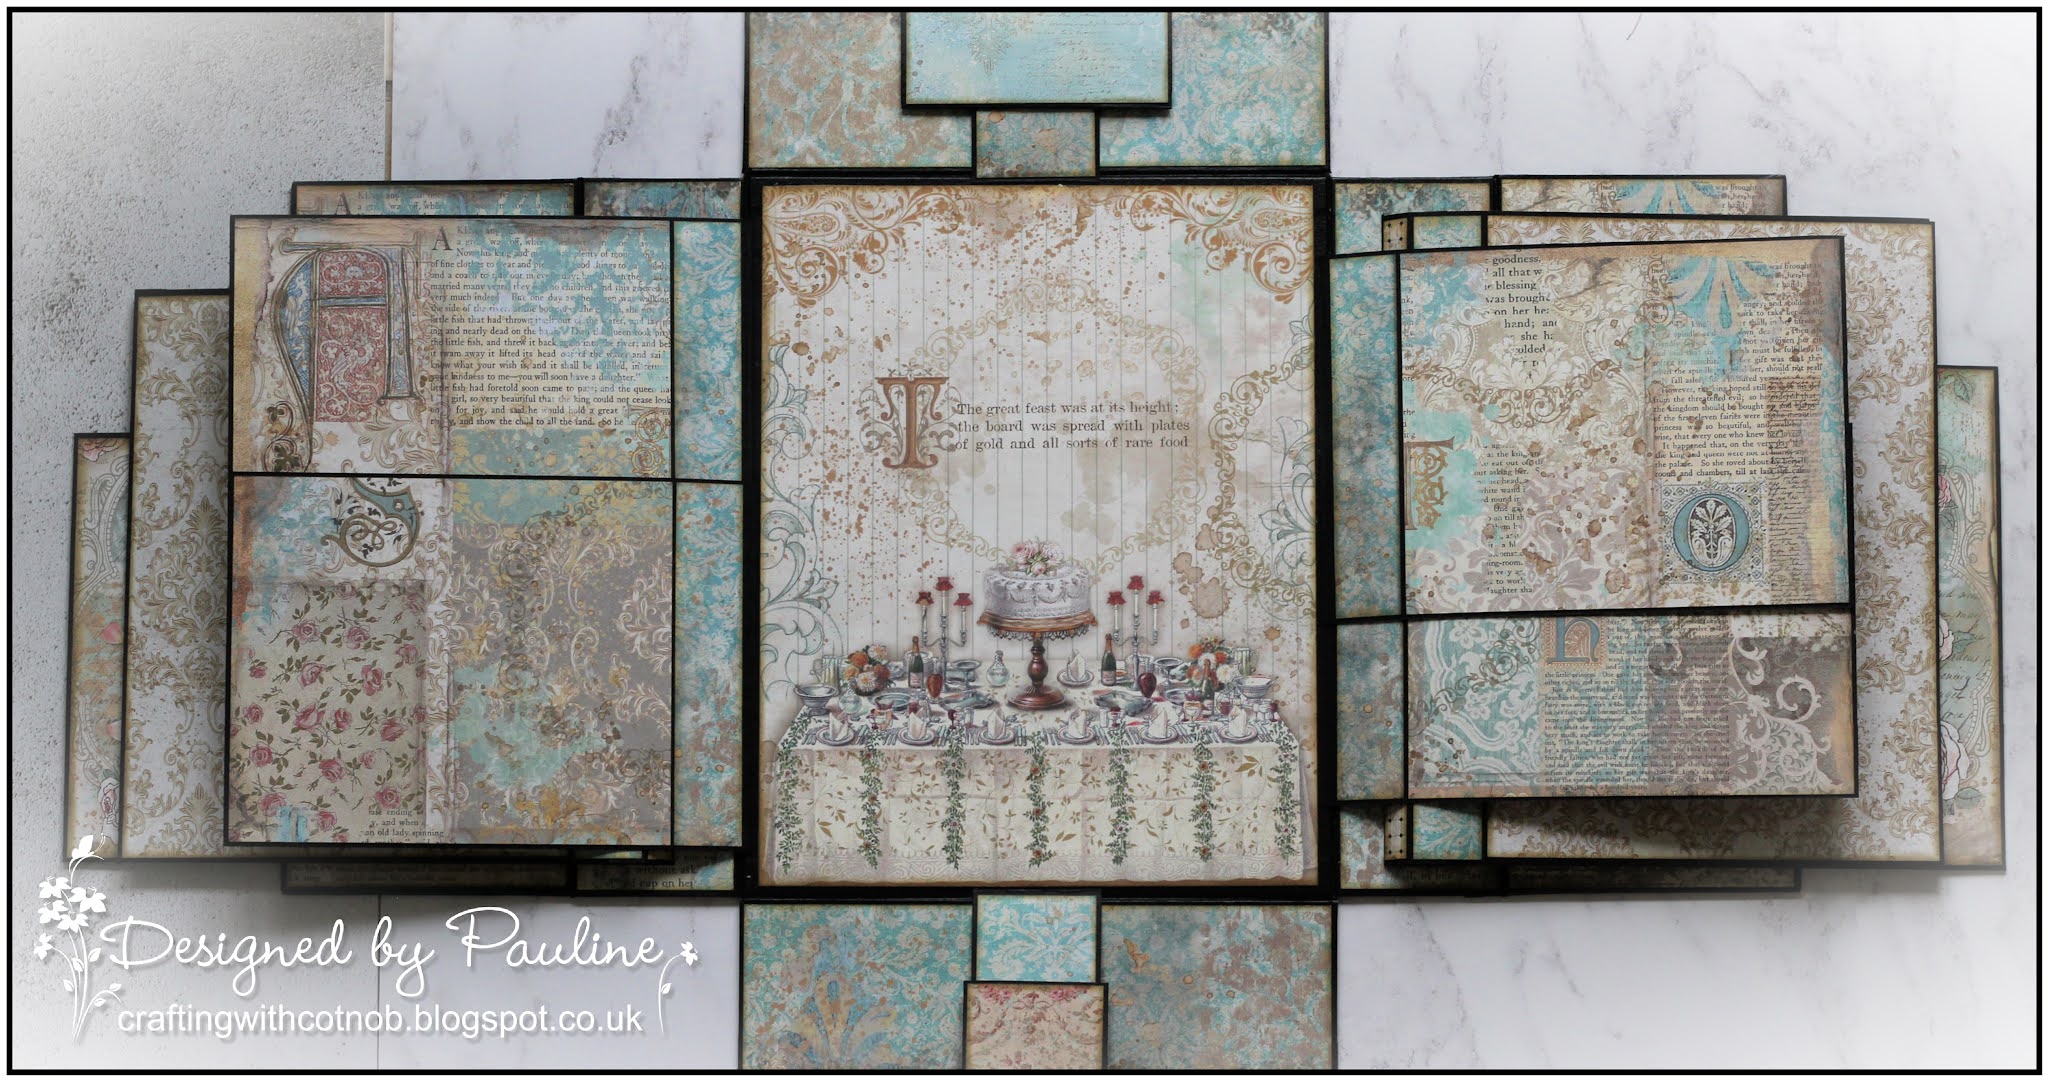
I took part in the My Creative Spirit Facebook Live Class No. 25, it was about four weeks ago and it has taken me a while to complete the project.  It is a Layered Box Album and it is rather large - just over 10" x 8" x 2 1/2" when closed and quite difficult to photograph, I have not done it justice.


Above the album is closed, it is secured with magnets and below it is fully opened out, there are four pages and they get slightly larger as you go through and as they are mounted on the sides of the box they splay out as it is opened.


The following photographs show the flaps as they are opened out, I love the Stamperia Sleeping Beauty papers so much that I could not bring myself to cover them up with any of the additional flaps and pockets that Clare showed us how to make.


Below you can see a buckle closure, it holds the centre four flaps closed and there is lots of room for expansion if you wish to add photographs or embellishments.


I really enjoyed creating this album, it took me a while and like I said the photographs do not do it justice but I love it.

Thank you for visiting my blog today, your company is much appreciated - please leave a comment so that I can come and visit you.

Pauline
x

Sunday, 17 October 2021

Beauty is Power

I have been taking part in another Facebook Live Workshop with Clare from My Creative Spirit this weekend, we are creating a Sliding Box and Album.  I am using the Stamperia Hortensia collection to decorate mine and decided to take some time out to create a card.


I used two papers from the 8 x 8 paper pad along with several fussy cut pieces from the 12 x 12 paper pad, the doily is a Dress My Craft die cut and the sentiment is also from the Stamperia collection, I wrapped it with some twine that I secured with a bow.


Thank you for popping in today, your company is much appreciated - please leave a comment so that I can come and visit you.

Pauline
x

Monday, 27 September 2021

Mini Monday

It's time for Mini Monday again, this week I have created a couple of ATCs using my Stamperia Sir Vagabond in Japan collection.


To create one of the ACTs, the photograph seems to have disappeared from my camera, I used a couple of the papers, a tag with the gorgeous lady on it along with some fussy cut flowers and fans, everything has been layered up with foam pads for dimension.
 
For the second ATC I have used two of the beautiful papers, a fussy cut tag with the fabulous fish on it  and several cogs that were also fussy cut from one of the papers.  I have layered everything up with foam pads again and added a little scrap of twine.


Thank you for popping in today, your company is much appreciated - please leave a comment so that I can come and visit you.

Pauline
x

Thursday, 16 September 2021

The Alberta Folio

I took part in another Facebook Live Workshop with Clare, My Creative Spirit a couple of weeks ago and this is the album that we created.

It is a large Folio Album, it measures just over 10 x 8 inches and has four pages - I used the Stamperia Sir Vagabond in Japan collection to decorate mine.

This is the front cover, I left mine plain, I love the papers so much I didn't want to cover them up with anything, it is a box folio with a magnetic closure.


This is the inside front cover, there is a box pocket with a policy envelope in it, the policy envelope opens out so that you can put things inside it.  There are four leaves that get slightly larger as you go through, the first page is split with two flaps that each have a small pocket, I have placed a bookmark, a tag and a journal card in the pockets. 


The back of each page has a small pocket, I have placed a tag in each of the pockets on the back of the first page.

Page two has  a fold out flap, mine has Lady Vagabond on it, isn't she beautiful.


Below is the back of page two with a journal card in the pocket and the front of page three which is another policy envelope,  I have used a large tag to keep mine closed.


I forgot to take a photograph of the front of page four, you can see it behind page three - it is just a plain page, you can see the back below, there is a large tag in the pocket.

On the back cover there is an expandable folder, below you can see the folder closed.


This is the folder with the side flaps opened out, all of the flaps have expandable sides, this gives you room to add lots of photographs or add-ons.


Here you can see the side flaps and the top and bottom flaps opened out to reveal two smaller flaps on the inside.


All of the flaps opened out, this was not the easiest album to photograph and the photographs do not do it justice, it looks much better in real life.


I hope I haven't bored you to death with all of the photographs, I really enjoyed making this project, the papers are absolutely gorgeous, now all I need to do is make sure I don't buy some more!

Thank you for visiting my blog today, your company is much appreciated - please leave a comment so that I can come and visit you.

Pauline
x

Sunday, 18 April 2021

The beauty of Nature

I saw this beautiful image on the CraftsUprint site and loved it so much that I decided to buy it.  I didn't really like the background that came with the image so I added some of my own papers.


I chose one of the papers from the new Stamperia Amazonia collection and after inking all of the edges I backed everything with dark brown card stock.  I used foam pads to adhere the image for dimension, there is also a decoupage layer, I also added a sentiment that came with the image, there are several to chose from.


Thank you for popping in today - please leave a comment so that I can come and visit you.

Pauline
x

Friday, 16 April 2021

Inspire

Have you seen the new Stamperia releases, they are absolutely gorgeous.  I have created this card using the new Passion collection, it is full of gorgeous musical and ballet themed toppers and papers.


I fussy cut this beautiful cello image from the 8 x 8" pad to create a slimline card.  I attached it using foam pads for dimension, the sentiment is also from the collection along with the papers.


Thank you for popping in today and thank you for all of the lovely comments that you leave, they are all read and much appreciated.

Pauline
x

Thursday, 8 April 2021

Birthday Butterfly

This is the final card that I have created with my Stamperia Spring Botanic collection, I have lots left though, plenty to make some more in the future.


I used four of the papers along with some pink card stock and inked the edges of everything again.  I used one of the beautiful toppers, there are so many of them, it was difficult to choose which one to use, the sentiment is another one from my Lisa Horton Crafts Wordage Sheets and I used my Tattered Lace Fleurs Dies to cut the flowers.


Thank you for popping in today and thank you for all of the lovely comments that you leave, they are all read and much appreciated.

Pauline
x

Monday, 5 April 2021

Paper Hugs

Another Slimline design today, I really love creating these at the moment - it makes a nice change from my normal square cards.


I have used my Stamperia Spring Botanic collection again, I used two of the papers, a topper and some corrugated card stock.  Lots of torn edges and inked edges along with some die cut flowers and a Lisa Horton sentiment again.


Thank you for visiting my blog today, please leave a comment so that I can come and visit you.

Pauline
x

Saturday, 3 April 2021

Make Today Amazing

I have another Stamperia Spring Botanic card to share today, I love the pretty colours in this collection and I have a bit of a thing about insects and butterflies.


I have used three of the papers along with a border and a topper, the sentiment is another one from the Lisa Horton Crafts Wordage Sheets, there are lots of really useful sentiments on each sheet. I have inked the edges of everything and used my Die-namics Fishtail Flag dies to cut the banners.


Thank you for visiting my blog today, your company is much appreciated - please leave a comment so that I can come and visit you.

Pauline
x

Thursday, 1 April 2021

Spring Botanic

I have created a double pocket card with my Stamperia Spring Botanic collection, I like this card design because you can create it with one sheet of 12 x 12 paper or card stock - there are lots of tutorials on YouTube.


I made my card base from a sheet of 12 x 12 cream card stock and used two of the beautiful papers to cover it.  I fussy cut three tags from the paper collection, there is a sheet containing twelve beautiful tags, to place in the pockets.  I attached the topper and label to some more of the cream card stock and inked the edges of everything.


This is a close up of the three tags that are in the pockets.


Thank you for visiting my blog today, please leave a comment so that I can come and visit you.

Pauline
x

Monday, 29 March 2021

Natural History

I'm a bit obsessed with my Stamperia collections at the moment, this time I've been playing with the Spring Botanic collection.


There are lots of beautiful floral and natural history toppers and papers in this collection, I decided to use a gorgeous butterfly topper for this card.  I also used two of the papers, a border and a label, I inked the edges of everything and popped the topper up with some foam pads, the buttons are from my collection of vintage buttons, they are glass flowers but unfortunately they don't show up very well in the photographs.


Thank you for visiting my blog today, your company is much appreciated - please leave a comment so that I can come and visit you.

Pauline
x

Saturday, 20 March 2021

Wings to Fly

I have created another card using my Stamperia Wonderland collection.


As before I have used lots of the beautiful papers, this time I've used three along with a gorgeous image.  I have inked the edges of everything and added a flower cut using my Tattered Lace dies.


Thank you for popping in today - please leave a comment so that I can come and visit you.

Pauline
x

Wednesday, 17 March 2021

A Single Dream

I have been having a play with my Stamperia Wonderland collection and decided to create a slimline card for a change.


I have used four of the beautiful papers along with a circular topper, I cut the base layer using my Tim Holtz Deckle Torn Edge Trimmer and used my Die-namics Fishtail Flags dies to cut the banners.  The flowers were cut with Tattered Lace Fleurs dies and I fussy cut the butterfly.


Thank you for popping in today and thank you for all of the lovely comments that you leave, they are all read and much appreciated.

Pauline
x

Tuesday, 23 February 2021

Home Sweet Home

This is the final card that I have created with my Stamperia Patchwork collection, I am still working on my Mini Album but it will be a little while before I finish it.


This time I have only used one of the papers and several fussy cut elements to create a New Home card.  The flower was cut from another of the papers and the key is one that my husband made for me using his 3D Printer, he sprayed it black for me and I added some gold gilding wax.


Thank you for visiting my blog today, your company is much appreciated - please leave a comment so that I can come and visit you.

Pauline
x

Sunday, 21 February 2021

Love, Laugh, Smile

This is another card that I created with my Stamperia Patchwork collection, it was going to be my husband's Valentine card but I didn't get it finished in time!


I used two of the papers and lots of fussy cut bits and bobs, I inked the edges of everything and used foam pads to attach all of the elements.


Thank you for visiting my blog today, your company is much appreciated - please leave a comment so that I can come and visit you.

Pauline
x