Thursday 27 January 2022

Yesterday's Garden

At last, I have a card to share - I've been having a bit of a destash and I've sold lots of my unwanted dies, it's quite time consuming!


I have used the Yesterday's Garden collection from The Paper Tree, I used one of the toppers, a sentiment and three of the papers from the collection, I also used some of the coloured card stock from the Essential Card collection.


Thank you for popping in today, please leave a comment so that I can come and visit you.

Pauline
x

Monday 24 January 2022

Suntastic

I have created another card using my Mintay Suntastic collection, there's nothing wrong in dreaming is there!


I love the gorgeous colours in this collection, I have used two papers from the 6 x 6 paper pad and fussy cut the elements from the 12 x 12 paper pad.  The sentiment is from the Cardboard Sticker sheet and I cut the flowers from some of the papers using my Tattered Lace Fleurs dies.


Thank you for visiting my blog today and thank you for all of the lovely comments that you leave, they are all read and much appreciated.

Pauline
x

Friday 21 January 2022

Chill Out

Can you tell I am dreaming about warm summer days, the only trouble is, when summer arrives I will be complaining about the heat - there is no pleasing some people!


I decided to use my Mintay Suntastic collection to create this card, I used papers from the 6 x 6 paper pad and fussy cut the elements from the 12 x 12 paper pad, the sentiment and little banner are from the Cardboard Sticker sheet.  I used my Tattered Lace Fleurs dies to cut the flowers from some of the papers and added a twine messy bow.


I haven't spent much time crafting recently, it is so cold me and hubby have been lighting our wood burning stove and sitting in the warm reading and watching films - it makes a nice change.

Thank you for popping in today, your company is much appreciated - please leave a comment so that I can come and visit you.

Pauline
x

Monday 17 January 2022

Oriental Delights

This is the third and final card that I have created with my Hunkydory Eastern Wishes collection.  I have been using the Oriental Delights Topper Set.


I have used the smaller topper again, there are two of each topper set - it is a square topper, I cut it out with a circle die and layered it up with some of the A4 patterned cardstock and some matching cardstock.  I also used two of the papers from the Luxury Inserts and Papers collection and one of the A4 cardstock sheets.  I used my Tattered Lace Fleurs dies to cut the flowers and an unlabeled die to cut the foliage, the sentiment is from Lisa Horton Crafts.


Thank you for visiting my blog today, please leave a comment so that I can come and visit you.

Pauline
x

Saturday 15 January 2022

Eastern Wishes

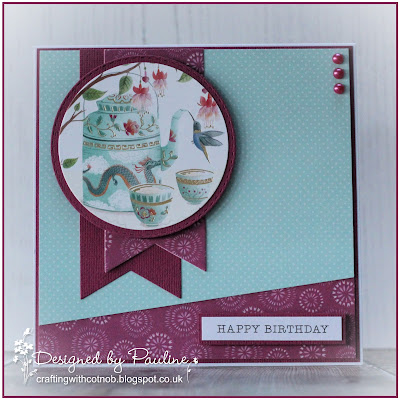
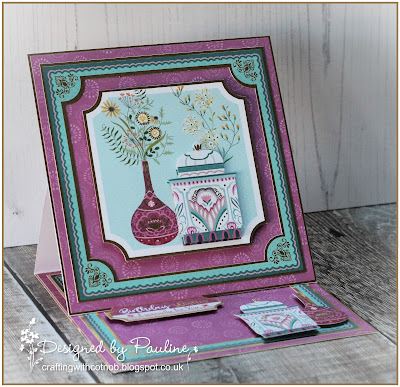
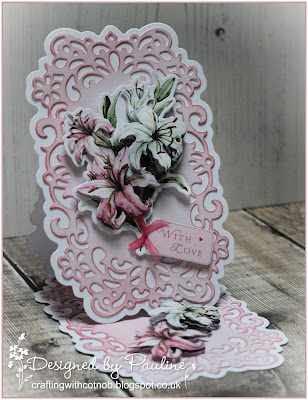
This is the second card that I have created with my Hunkydory Eastern Wishes collection, this time I have made a simple card and cut away all of the gold foiling that I don't really like anymore.


I have used one of the toppers, I cut it out with a circle die and added it to a mat that I cut from matching cardstock with a stitched circle die.  I also used one of the papers from the Luxury Inserts and Papers collection, one of the A4 cardstock sheets and a sentiment -  I cut the banners with my Die-namics Fishtail Flag dies.


Thank you for popping in today, please leave a comment so that I can come and visit you.

Pauline
x

Thursday 13 January 2022

Eastern Charm

I'm still trying to use up some old stash, this time I've used the Hunkydory Eastern Wishes Luxury Card Collection - I have lots of Hunkydory in my stash, lots from when I was on their Design Team and lots that I've purchased myself and I have to admit that I don't really like all the gold on them anymore!


I created this card using a couple of the toppers, you get two of each design so I decided to fussy cut some bits from one to layer up, I also used one of the papers from the Luxury Inserts and Papers collection, one of the A4 cardstock sheets and a sentiment.

I will share another card that I have created with this collection soon, I have cut away all of the gold foil to create a more simple card and am in the process of making another one without the gold foiling but a more fussy and fancy design.


Thank you for visiting my blog today and thank you for all of the lovely comments that you leave, they are all read and much appreciated.

Pauline
x

Tuesday 11 January 2022

Happy Unbirthday

I have created another card with my Stamperia - Alice Through the Looking Glass collection.


I used one of the beautiful patterned papers as the background and fussy cut Alice from one of the Card Collection toppers, I popped her up on the matching topper cut from the paper pad and added that to the card front using foam pads. I added the Eat Me label using foam pads and decorated the inside of the card with more of the patterned papers.


Thank you for popping in today, your company is much appreciated - please leave a comment so that I can come and visit you.

Pauline
x

Sunday 9 January 2022

Christmas Critters

These are the final two cards and gift bags that I made for my son to give his pupils at Christmas, thank goodness for that I hear you all say!


I have used toppers, papers and sentiments from the Sara Davies Watercolour Christmas Collection from Crafter's Companion.


We had a terrible day yesterday, wet, windy and dark all day, a lovely sunny day is forecast for today, that's good old British weather for you!

Thank you for visiting my blog today, please leave a comment so that I can come and visit you.

Pauline
x

Friday 7 January 2022

Beautiful Lilies

I made quite a few purchases during the recent Crafter's Companion 16th Birthday Celebrations and I'm trying to make sure that I actually use them, here I am sharing a card using two of the collections.


I created the Easel Card base using the outline die from the Intri'lace Floral Fretwork Dies, and cut two panels from white cardstock using the fretwork die, I added some colour to them with Distress Ink and adhered them to the base.  I cut the floral centrepiece from the topper pad using the matching dies, it's a bit difficult to get them to line up so I ended up cutting two sets and used some of them as the stopper for the easel.  The little sentiment tag is from my stash, I think it was from an old card.


Thank you for popping in today, please leave a comment so that I can come and visit you.

Pauline
x

Thursday 6 January 2022

Frequently asked questions ...

I am going to answer another of the Frequently asked questions that I have received on my blog, quite a few people have asked how I computer generate a white on black sentiment like the one on this card HERE.


It really is quite simple, I always use Microsoft Word to create my sentiments.

Open a new document and click 'Insert' on the Toolbar at the top of the screen.  Then click on 'Text Box' and then 'Draw Text Box' at the bottom of the drop down window.

Using the computer mouse draw a text box large enough for your sentiment.  Click on 'Shape Fill' and select black.

Click on 'Home' on the Toolbar and select 'White' from the font section.

You can now type your sentiment and choose the font and size that you require.

I hope this helps those that have asked the question.

Pauline
x

Wednesday 5 January 2022

Tweedledee and Tweedledum

I decided to create some cards with the Stamperia Alice Through the Looking Glass collection, I have a bit of a thing about Alice!

I have the 12 x 12, 8 x 8 and 6 x 6 paper pads, I also purchased the Cards Collection, there are several different sizes of toppers, some are repeats of the toppers in the 12 x 12 paper pad and you know what that means - I can do some fussy cutting and layer them up for dimension.


I used one of the beautiful patterned papers as the background and fussy cut Alice and Tweedledee and Tweedledum from one of the Card Collection toppers, I popped them up on the matching topper cut from the paper pad and added that to the card front using foam pads. I trimmed the inside of the frame from the Card Collection topper to use on the inside of the card, I just put some cream cardstock behind it and layered it up on some more of the patterned paper. I fussy cut the little tag from one of the papers and added a small twine bow.


Thank you for visiting my blog today and thank you for all of the lovely comments that you leave, they are all read and much appreciated.

Pauline
x

Tuesday 4 January 2022

Hot Chocolate Gift

I made up several of these Hot Chocolate Gift sets to give as small gifts this Christmas.

I found the mugs on Amazon and popped a Salted Caramel Hot Chocolate Spoon, some Marshmallows, a chocolate Santa and some other assorted chocolates in them. I put them in gift bags that I created with papers from the Violet Studio Home for Christmas collection, I used two papers for each bag and secured them with some twine from my stash.


Thank you for popping in today, your company is much appreciated - please leave a comment so that I can come and visit you.

Pauline
x

Monday 3 January 2022

18th Birthday Shadow Box

It was a friend's 18th Birthday just before Christmas and this is the gift that I created for her, it matches the card that I shared HERE.

I used the Authentique Flawless collection, the numbers were cut with Tonic dies, the Happy Birthday is a Marianne CrafTables die and I used my Memory Box Alphabet Tile Letters to cut out her name.


I suppose everything will get back to some sort of normality tomorrow, not much will change for us, both me and hubby are retired, the only difference will be our youngest son will be working from home.

Thank you for visiting today, please leave a comment so that I can come and visit you.

Pauline
x

Sunday 2 January 2022

Super Santa

I have a few more Christmas cards to share today, I have used the super Santa toppers and papers that came with the Nov/Dec edition of Marking Cards Magazine.


I cut the toppers out with nesting dies and computer generated the sentiments, I created the bags with papers from the Violet Studio Home for Christmas collection.


Who has taken down their Christmas decorations, my youngest son and hubby took ours down and everything looks very bare now - I have some nice new curtains for the sitting room and some nice new cushions, hopefully that will brighten things up again.

Thank you for popping in today, please leave a comment so that I can come and visit you.

Pauline
x

Saturday 1 January 2022

Happy New Year

I have created a Tower Card, I have seen a few around recently and decided to have a go myself - they are very simple to create.

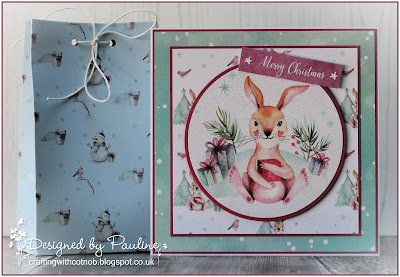
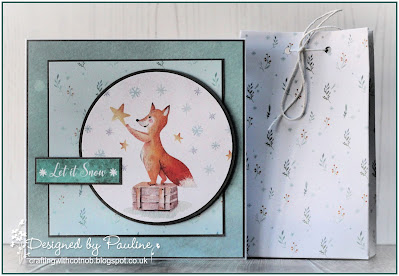
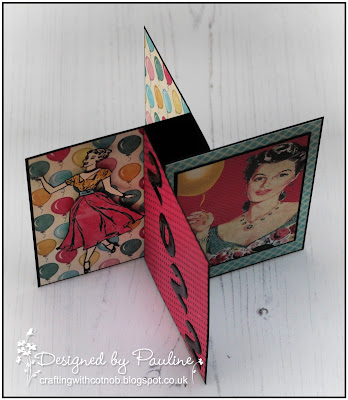
I decided to make mine a New Year card and used my Authentique Party Collection.


I created the Tower base with black card stock and cut the 2022 from black card stock as well, I then added 3D Crystal Lacquer to the numbers.


I used several papers and two of the fun toppers from the collection.


I added a computer generated sentiment.


This is the Tower card folded flat for posting.

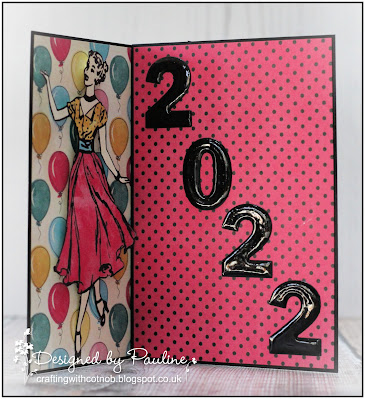
I would like to wish all of my lovely followers a very Happy and Healthy New Year.

Thank you for visiting my blog today and thank you for all of the lovely comments that you leave, they are all read and much appreciated.

Pauline
x