I have been having a play with the Hunkydory Sporting Silhouettes collection, I wouldn't normally go for this type of collection but I thought it would be ideal for masculine makes.
Showing posts with label Z-fold. Show all posts
Showing posts with label Z-fold. Show all posts
Thursday, 11 August 2022
Sail Away with Me
Monday, 22 March 2021
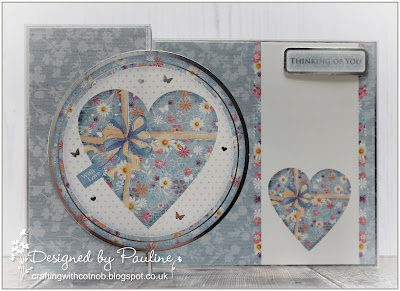
Thinking of You
I have been making some cards with some of my Hunkydory Collections, I have rather a lot of them, mostly from when I was on the Hunkydory Design Team but I can't resist buying their collections.
Thursday, 6 December 2018
Pink Paradise
This is another of the cards that I created using the Square Die Collection from Creative Crafting World, they are available from the Creative Crafting World Website.
You can find more cards created using this collection HERE.
I just used the outside die to cut an aperture from some of the green card from the Pink Paradise Coloured Card collection and layered it onto one of the pretty patterned papers.
The daisies are part of the Square Die collection along with the sentiment.
Thank you for visiting my blog today, please leave a comment so that I can come and visit you.
Pauline
x
Tuesday, 30 October 2018
Life is a Paradise
This is another of the cards that I created using the Square Die Collection from Creative Crafting World, they are available from the Creative Crafting World Website.
You can find more cards created using this collection HERE.
I used card stock from the Pink Paradise Card collection along with one of the pretty papers and sentiment toppers.
This is a beautiful collection of papers, perfect for girly cards and the pink and green are so pretty together.
Thank you for visiting my blog, please leave a comment so that I can come and visit you.
Pauline
x
Saturday, 13 October 2018
Shine Bright
This is another of the cards that I created using one of Lynda Chapman's dies from the Square Die Collection that is now available on the Creative Crafting World Website.
You can find more cards created using this collection HERE.
The sentiment topper, papers and card stock are all from the Pink Paradise Paper Collection. The die that I used to create the flower and leaves is part of the square die collection.
Thank you for visiting my blog today and thank you for all of the lovely comments that you leave - they are all read and very much appreciated.
Pauline
x
You can find more cards created using this collection HERE.
I decided to use the die to create a swing card, it was quite a simple process - a lot easier than I thought it would be, I just placed the metal shim between the card stock and the part of the die that I did not want to cut.
Thank you for visiting my blog today and thank you for all of the lovely comments that you leave - they are all read and very much appreciated.
Pauline
x
Monday, 26 February 2018
Z-fold card designs
Craft Stash are sharing a Master Class that I created for Simply Cards and Papercrafts Issue 165 on their blog, there are step by step instructions with photographs detailing how to create a simple Z-fold and also a more advanced design.
Pop over and take a look HERE if you fancy have a go at creating a Z-Fold card and you are not quite sure how to go about it.

Thank you for popping in today, your company is much appreciated.
Pauline
x
Pop over and take a look HERE if you fancy have a go at creating a Z-Fold card and you are not quite sure how to go about it.

Pauline
x
Sunday, 27 August 2017
Another Tutorial
If you are a regular visitor to my blog you might remember a series of Z-fold cards that I created for Simply Cards & Papercraft magazine.
As part of the commission I created two step by step tutorials, I have already shared the beginner design HERE - this is the more advanced design.
This is the finished card.
Score a 30 x 21 cm piece of blue card stock at 7.5 cm and 15 cm. Trim a 6cm strip from the bottom of the card stock. Trim the larger piece of card stock diagonally from a point 9.5 cm from the bottom left corner to the top right corner.
 Valley fold both pieces of card stock along the 15 cm score line and mountain fold along the 7.5 cm score line. Cover the front panels with patterned paper leaving a narrow border.
 Adhere the smaller panel to the front of the card to form the Z shape.
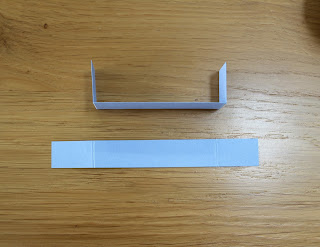
Cut two 12.3 x 1.5 cm strips of blue card stock and score at 2.5 cm from each edge, fold along the score lines.
Attach to the inside of the box that has been formed in the centre of the card.
 Repeat with the second strip of card stock to form a pop up box.
Thank you for visiting my blog today.
Pauline
x
Friday, 18 August 2017
A quick tutorial
If you are a regular visitor to my blog you might remember a series of Z-fold cards that I created for Simply Cards & Papercraft magazine.
As part of the commission I created two step by step tutorials and as the magazine is no longer available I thought I would share one of them on my blog.
This is the finished card, it is a beginner design.
Score a 30 x 20 cm piece of card stock at 7.5 cm and 15 cm.
Trim 5 cm from the card stock to create two separate panels.
Valley fold both pieces of card stock along the 15 cm score line and mountain fold along the 7.5 cm score line.
Rotate the smaller panel and cover the front panels with pattered paper, I always leave a narrow border around the outside.
Adhere the narrower strip to the card front to form the 'Z' shape.
Decorate as desired.
I hope this step by step is helpful to those of you that haven't created a Z-fold card yet.
Thank you for visiting my blog today.
Pauline
x
As part of the commission I created two step by step tutorials and as the magazine is no longer available I thought I would share one of them on my blog.
This is the finished card, it is a beginner design.
Score a 30 x 20 cm piece of card stock at 7.5 cm and 15 cm.
Trim 5 cm from the card stock to create two separate panels.
Valley fold both pieces of card stock along the 15 cm score line and mountain fold along the 7.5 cm score line.
Rotate the smaller panel and cover the front panels with pattered paper, I always leave a narrow border around the outside.
Adhere the narrower strip to the card front to form the 'Z' shape.
Decorate as desired.
Thank you for visiting my blog today.
Pauline
x
Saturday, 29 July 2017
Party Time
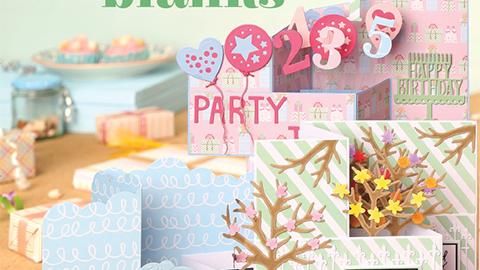
This is the final Z-fold card that I created for this months Simply Cards & Papercraft Magazine. I was commission to produce a Masterclass on making Z-fold cards using the Trimcraft Make a Wish paper pad.
The balloons, numbers and birthday cake are all from the Crafter’s Companion Sara Davies Birthday Party Signature Collection. The letters are from the Lawn Fawn Finley’s ABCs Die collection.
This photograph shows the inside of the card ready to have the elements attached.
I really enjoyed making these cards, it was quite a challenge to create six especially as it's not a style that I normally make.
Thank you for visiting my blog today, your company is much appreciated.
Pauline
x
Sunday, 23 July 2017
Let's Party
This is the second of the beginner Z-fold cards that I created for this months Simply Cards & Papercraft Magazine. I was commission to produce a Masterclass on making Z-fold cards.
I used the Trimcraft Make a Wish 12” x 12” Paper Pad for all of the cards in the series, for this one I added a die cut sentiment and stamped sentiment from the Crafter’s Companion Sara Davies Birthday Party Signature Collection.
I used the Trimcraft Make a Wish 12” x 12” Paper Pad for all of the cards in the series, for this one I added a die cut sentiment and stamped sentiment from the Crafter’s Companion Sara Davies Birthday Party Signature Collection.
Friday, 21 July 2017
Floral Lattice
This is the third of six cards that I have published in this months Simply Cards & Papercraft Magazine. I was commission to create a Masterclass on making Z-fold cards.
This is the second of the intermediate designs.
I used the Trimcraft Make a Wish 12” x 12” Paper Pad along with some dies from a couple of Sara Davies Signature Collections. The pink flowers are a Joy Crafts Stamp, I stamped them with pink ink and fussy cut them.
This is the second of the intermediate designs.
I used the Trimcraft Make a Wish 12” x 12” Paper Pad along with some dies from a couple of Sara Davies Signature Collections. The pink flowers are a Joy Crafts Stamp, I stamped them with pink ink and fussy cut them.
I really enjoyed making these cards, it's not something that I normally do - they are certainly a challenge to photograph.
Thank you for visiting my blog today, your company is much appreciated.
Pauline
x
Thank you for visiting my blog today, your company is much appreciated.
Pauline
x
Tuesday, 18 July 2017
New Baby Boy
This is another of the Z-fol cards that I have published in this months edition of Simply Cards & Papercraft. I was really honoured to be asked to produce the Masterclass this month - I was commissioned to create six cards - two beginner designs, two intermediate and two advanced. This is one of the beginner designs.
I was sent the Trimcraft Make a Wish 12” x 12” Paper Pad to use and I paired it with stamps and dies from the Crafter’s Companion Sara Davies Little Angel Signature Collection.
Pauline
x
Thursday, 13 July 2017
Birthday Bunting
Issue 165 of Simply Cards & Papercraft is in the shops today so I can share some of the cards that I have in this months magazine.
I was really honoured to be asked to produce a Masterclass all about creating Z-fold cards. I was commissioned to create six cards - two beginner designs, two intermediate and two advanced. This is one of the intermediate designs.
I was sent the Trimcraft Make a Wish 12” x 12” Paper Pad to use and I paired it with dies from the Crafter’s Companion Sara Davies Birthday Party Signature Collection. The little parcels are from Stamps by Chloe, the buttons, ribbon & twine are all from my stash.
Make sure you pick up a copy of this months magazine, it has lots of beautiful cards in it and the free gift is a fabulous bird stamp set and die along with some beautiful Prima papers.
Thank you for visiting my blog today, your company is much appreciated.
Pauline
x
I was really honoured to be asked to produce a Masterclass all about creating Z-fold cards. I was commissioned to create six cards - two beginner designs, two intermediate and two advanced. This is one of the intermediate designs.
Make sure you pick up a copy of this months magazine, it has lots of beautiful cards in it and the free gift is a fabulous bird stamp set and die along with some beautiful Prima papers.
Thank you for visiting my blog today, your company is much appreciated.
Pauline
x
Subscribe to:
Posts (Atom)


