Showing posts with label Frequently asked questions. Show all posts

Thursday, 6 January 2022

Frequently asked questions ...

I am going to answer another of the Frequently asked questions that I have received on my blog, quite a few people have asked how I computer generate a white on black sentiment like the one on this card HERE.


It really is quite simple, I always use Microsoft Word to create my sentiments.

Open a new document and click 'Insert' on the Toolbar at the top of the screen.  Then click on 'Text Box' and then 'Draw Text Box' at the bottom of the drop down window.

Using the computer mouse draw a text box large enough for your sentiment.  Click on 'Shape Fill' and select black.

Click on 'Home' on the Toolbar and select 'White' from the font section.

You can now type your sentiment and choose the font and size that you require.

I hope this helps those that have asked the question.

Pauline
x

Sunday, 3 September 2017

Frequently asked questions ...

I am going to answer another of the Frequently asked questions that I have received on my blog.


Today I am going to answer:

"How do you create a card digitally in Microsoft Word"

This is the way that I do it, it might not be the simplest or best way to do it but it is the way that I prefer.

Open a blank document in Microsoft Word and select Insert on the toolbar. Select Shapes and draw the shape that you require. You can adjust the size by selecting Format and the Size option. Make sure you position your shape in the correct place on the page if you are creating a one layer card.


Remove the colour from the inside of your shape by selecting Format from the toolbar followed by Shape Fill and clicking on the No Fill option.


If you want to create a border around the outside select Shape Outline and choose your design, you can make your design bolder by selecting the Weight option, you can also change the colour.


Copy and paste your chosen image into the shape and adjust the size and position as required.  I always right click on the image and select Wrap Text from the drop down menu and then In Front of Text - this makes it easier to manoeuvre your image within the shape.


Finally add your sentiment, you can either type your own or copy and paste a digital sentiment as I did.


You are now ready to print your card.


I hope you find this information useful, the best way to learn is to experiment and just have a play.  You can rotate your images by selecting the Layout option on the tool bar and add things like Soft Edges and Reflections in the Shape Effects option under the Format section.  If you do something wrong or that you don't like just hit the back arrow and have another go.

Thank you for visiting today, your company is much appreciated.

Pauline
x

Thursday, 15 June 2017

Frequently asked questions ...

I am going to answer another of the Frequently asked questions that I have received from friends and followers on my blog.


Today I am going to answer:

"Do you use a light box to take your photos?"

In short, the answer is no, I don't use a light box to take my photographs.  I am very fortunate that I have a room with lots of natural light including a skylight that I take my photographs directly below.

I am by no means an expert photographer but I do have a very good Canon Camera and a 50 mm 1.8 STM Lens that is particularly good for taking close up photographs.  I also use PicMonkey Photo Editor, the basic editing program is free but you can upgrade at a small cost to obtain additional features.

Having said all of that, I think the most important thing to remember when taking photographs of cards is to make sure your camera is on the same level as the item you are photographing.  I place a large box on my table and place a 12 x 12" sheet of white card stock on top, I then prop up another sheet at the back.

When I sit at a chair I can line my camera up with my card ensuring that I am at the same level, this makes it much easier to take a straight photograph and make sure your card looks square.  If you take your photograph from above or at an angle your card will distort and look askew.

I have two previous posts in this series where I answer

"What paper do you use for printing?"

and

"What printer do you use?"

You can find them both HERE, if you are interested and would like to take a look.

I hope you find this information useful and that I have managed to answer some of the questions that I have received. I would just like to say that I am NOT recommending these products, I am only letting you know what I use.

Pauline
x


Thursday, 8 June 2017

Frequently asked questions ...

I have been receiving quite a lot of questions from friends and followers on my blog again, so I thought I would resurrect my 'Frequently asked questions' series in order to answer some of them.


Today I am going to answer:

"What printer do you use?"

I use a Canon PIXMA MG5450 printer, I would say it is a mid range and retails at about £60.   I chose this one because it uses separate ink cartridges, I think this is better when you are printing lots of coloured pages - you always end up using more of one colour than others.


I always use genuine Canon ink, it is quick and easy to change the ink cartridges with no mess at all.   I tend to buy in bulk when I see a good price somewhere, our local Tesco quite often have BOGOF offers and Amazon can be very reasonable.

My printer will feed 300gsm card stock without any problems, I think I have probably used even thicker on occasion.  It will also feed cut out shapes like card blanks and die cuts - I just attach them to a piece of copy paper with some double sided tape and carefully peel them off when they have printed.  If there is a problem and I get a paper jam, it is really easy to just remove a panel at the back of the printer and remove the offending item.

I think that the paper you use is more important than the printer though and would recommend that you check out my blog post HERE  where I answer the question "What paper do you use for printing?"

I hope you find this information useful and that I have managed to answer some of the questions that I have received. I would just like to say that I am NOT recommending these products, I am only letting you know what I use.

Pauline
x

Wednesday, 10 August 2016

Frequently asked questions ...

I have been receiving lots of questions from friends and followers on my blog lately so I thought I do a little series of posts to answer some of them.


I have decided to start with

"What paper do you use for printing?"

Backing Papers:  I print all of my backing papers on a coated paper.  I use 170G Matt Coated Inkjet Photo Quality Paper from Photo Paper Direct


Decoupage and Toppers:  I often use the same paper to print decoupage images - you do need to be careful when cutting out though because as the paper is coated you can scratch the surface with your scissors.

I also use satin photo paper when I would like to achieve a glossy result.  I use A4 Satin Photo Paper Premium 200g also from Photo Paper Direct.

You might think that both of these are rather expensive but they are always on offer.  I also find that if you place an order and then don't order for a while you will receive additional offers via email - I have even managed to buy one pack and get three packs free, so I bulk buy and then wait for another good offer.

Digital Images:  I use Joanna Sheen's Elegance Satin card stock when I am going to colour with Alcohol Markers.


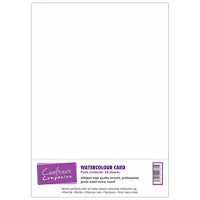
and Crafter's Companion Watercolour Card if I am going to use watercolours.


I hope you find this information useful and that I have managed to answer some of the questions that I have received.  I would just like to say that I am NOT recommending these products, I am only letting you know which products I prefer.

Pauline
x