
If you are a regular visitor to my blog you might remember a series of Z-fold cards that I created for Simply Cards & Papercraft magazine.
As part of the commission I created two step by step tutorials, I have already shared the beginner design HERE - this is the more advanced design.
This is the finished card.

Score a 30 x 21 cm piece of blue card stock at 7.5 cm and 15 cm. Trim a 6cm strip from the bottom of the card stock. Trim the larger piece of card stock diagonally from a point 9.5 cm from the bottom left corner to the top right corner.

 Valley fold both pieces of card stock along the 15 cm score line and mountain fold along the 7.5 cm score line. Cover the front panels with patterned paper leaving a narrow border.
 Adhere the smaller panel to the front of the card to form the Z shape.
Cut two 12.3 x 1.5 cm strips of blue card stock and score at 2.5 cm from each edge, fold along the score lines.
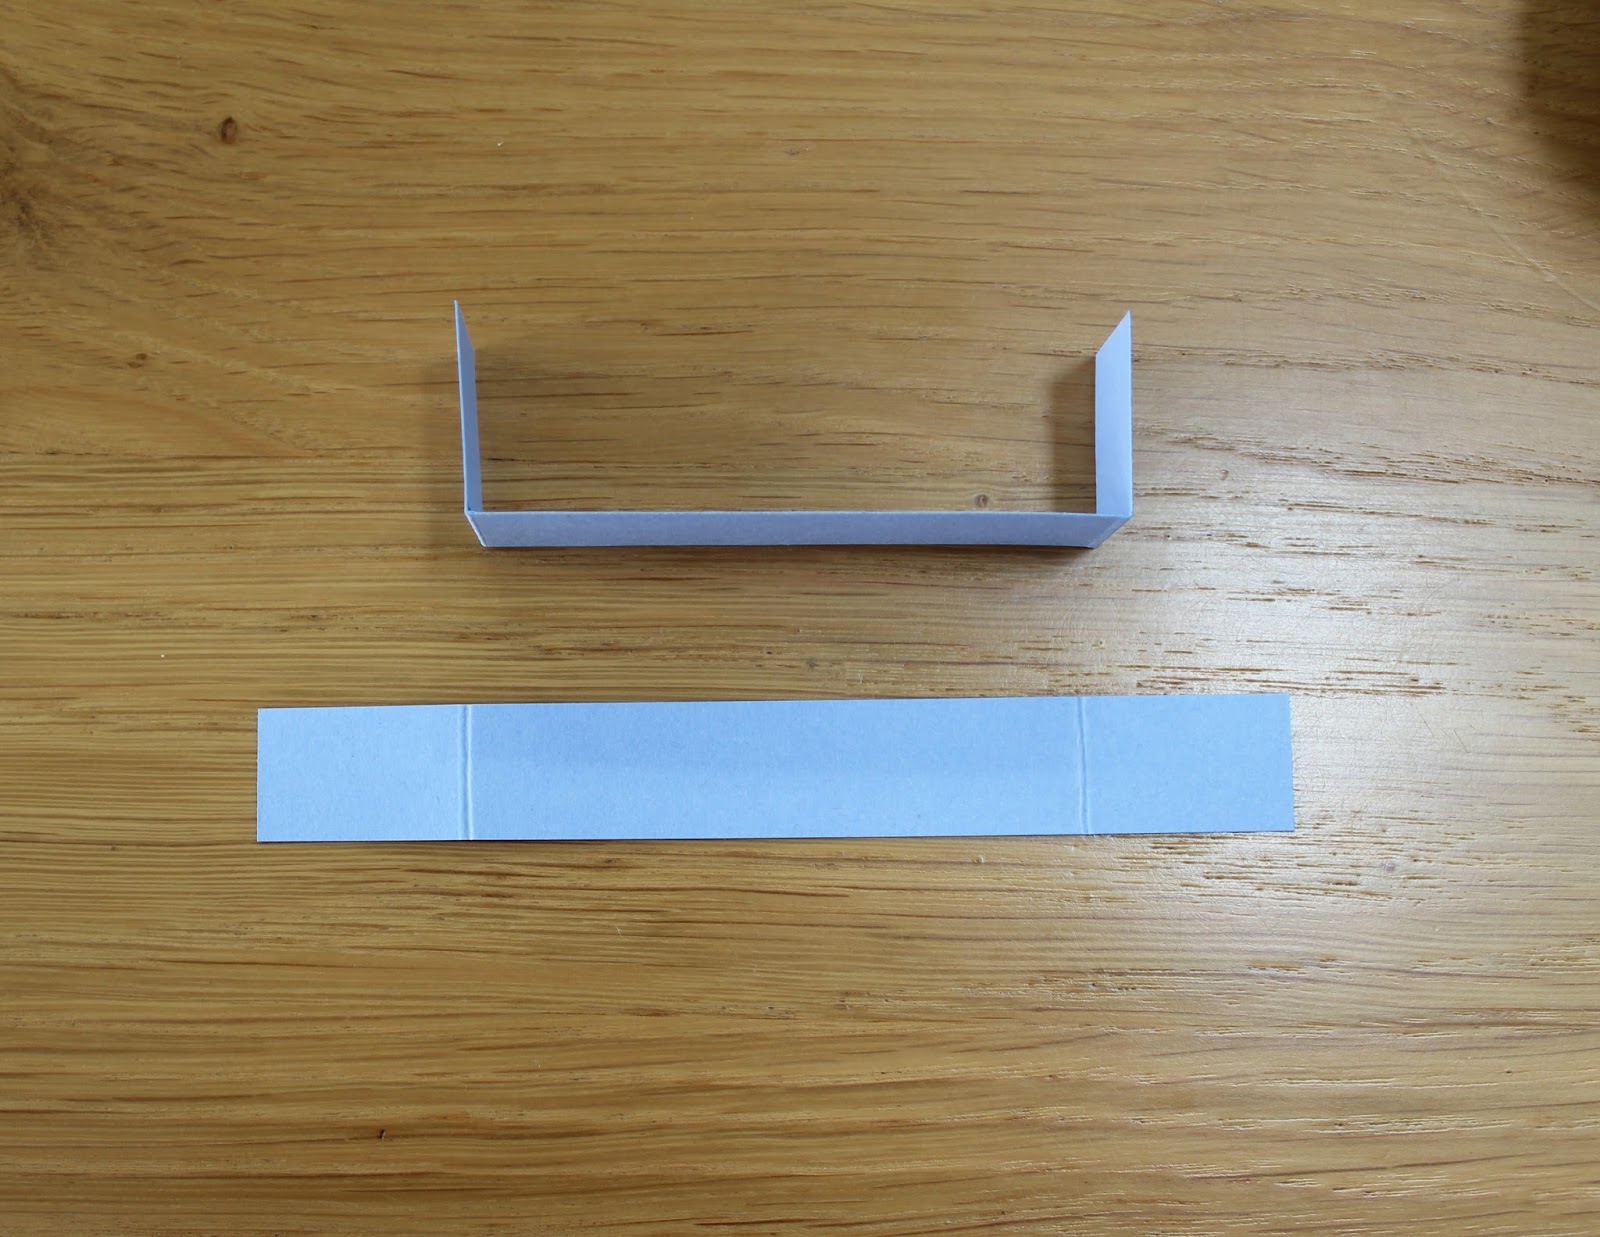
Attach to the inside of the box that has been formed in the centre of the card.
 Repeat with the second strip of card stock to form a pop up box.

Thank you for visiting my blog today.
Pauline
x
So pretty birthday card! Thanks for another tutorial on Z-fold! I have to try this
ReplyDeleteFantastic make Pauline, lovely clear instructions
ReplyDeleteSuper tutorial with great clear precise instructions. Hugs Jennifer xx
ReplyDeleteFabulous card and your tutorial specifying the steps is always great and easy to comprehend.xx [aNNie]
ReplyDeleteA great tutorial - the combination of z-fold and pop up box makes a really amazing looking card yet when you break down the steps it's quite simple to make.
ReplyDeleteJane
Gorgeous card Pauline, I saw this one in the magazine and love how you added the numbers using the acetate. A great tutorial.
ReplyDeleteHugs, Petra
Beautiful card Pauline and great step by step
ReplyDeleteCarol x
Fabulous card and a super easy to follow tutorial Pauline. Must try this xx
ReplyDeleteAnother lovely z-fold card and a brilliant tutorial....thank you Pauline.
ReplyDeleteStill definitely on my list to have a go at making the first one.
Janice x
A fantastic tutorial and card Thanks for sharing with us.
ReplyDeleteSue xx
Hallo liebe Pauline,
ReplyDeletedeine Karte sieht wunderschön aus. Die Gestaltung mit den Luftballons und Zahlen gefällt mir sehr gut. Vielen lieben Dank für die ausführliche Anleitung. Das werde ich sicher auch mal ausprobieren. Eine tolle Kartenform mit Wow-Effekt.
Ganz liebe Sonntagsgrüße herzlichst Hugs Silvi
what a show stopper . jane x
ReplyDeleteA Brilliant tutorial and card, even I could follow this (I think) LOL. LOVE it.
ReplyDeleteFaith
x
Fantastic card Pauline.
ReplyDeleteHugs
Kuni
Thank you for this tutorial,
ReplyDeletehugs
Ans x
Fabulous card Pauline and thanks for the tutorial, Kate x
ReplyDeleteBeautiful card Pauline. Thank you for the tutorial. Love the pop up element.
ReplyDeleteHi Pauline what a lovely card I love the colours you have used and your design is wonderful.
ReplyDeleteDebs cards xx
http://debsartliffscards.blogspot.co.uk/
Brilliant make and love the idea of the pop up box as an extra wow factor. great instructions too.
ReplyDeleteKath x
Beautiful card as always - thanks for sharing the tutorial
ReplyDeleteThanks for the tutorial and cute birthday card! Love it!
ReplyDeleteits awesome card!
ReplyDeleteThanks for the detailed instructions. I think I can follow these as they are so clear.
ReplyDeleteYour card is so pretty!
Thank you for the great instructions, Pauline. They are very helpful. Your card is beautiful. Kisses, my friend.
ReplyDeleteFabolous, thank you so much for this great tutorial.
ReplyDeleteHugs
Melodie
What a lovely and fun card! The tutorial is so helpful, I need to try this.
ReplyDeleteThanks for another tutorial on Z-fold! I have to try this
ReplyDeleteทางบ้าน
Great tutorial and pretty card
ReplyDeleteSo fabulous birthday card!thanks for the tutorial!
ReplyDeleteAnother brilliant design Pauline, and a very pretty card.
ReplyDeleteLorraine x
Our local stamp store featured this design in a class this month. Really fun to make and such fun to send, always a delight for the receiver. Your card is so pretty, and a wonderful tutorial too.
ReplyDeleteHugs
Sue
brilliant birthday card Pauline - fabulous tutorial too. Hugs Rachel x
ReplyDelete